
Better Home Assistant Backups Using Auto Backup
Making backups is SUPER important. I show you the EASY way to back up Home Assistant with Auto Backup.

This is not the most exciting thing to write about but it is probably the most important. After you have spent countless hours building your smart home platform, you want to make sure that if something happens, you have a way to recover. This is where regular backups come into play.
I have covered this topic before, using Google Drive and Samba Backup. Today I am going to talk about a different backup solution called Auto Backup. They all do much the same thing so you can choose what works best for you.
As you may know, Home Assistant has built-in backups that can be scheduled via automation. The difference between the built-in backups and Auto Backups is the ability to Exclude add-ons and folders as well as remove backups. You could configure HA backups to only include the things you want and by omission, exclude certain folders. However, you have to explicitly tell HA what to include. Why do that when you can use Auto Backup to set the excludes directly?
Features
- Provides more advanced and configurable service calls.
- Exclude addons/folders from a backup.
- Automatically delete backups after an individually specified amount of time.
- Backup to custom locations such as network storage.
- Download backups to a specified directory after completion (for example a usb drive).
- Allows the use of addon names instead of slugs.
- Provides a sensor to monitor the status of your backups.
- Creates events for when backups are started/created/failed/deleted.
- Supports generational backup schemes.
The ability to create generational backups also sets Auto Backup apart from other solutions. If you don't know what a generational backup is, it is the ability to reduce the frequency of backups as they get older. You can read all about it on the Auto Backup webpage by clicking the generational backup link above.
Installation
Installing Auto Backup is just like installing any other HACS integration. From the Auto Backup website, there is an "Add Integration To..." button. However, I prefer to install it manually.

If you haven't installed HACS, you will need to do that first. You can check out my latest video on HACS 2.0. Once you have HACS installed, and I will assume you are using version 2.0 of HACS, you just need to search for Auto Backup.
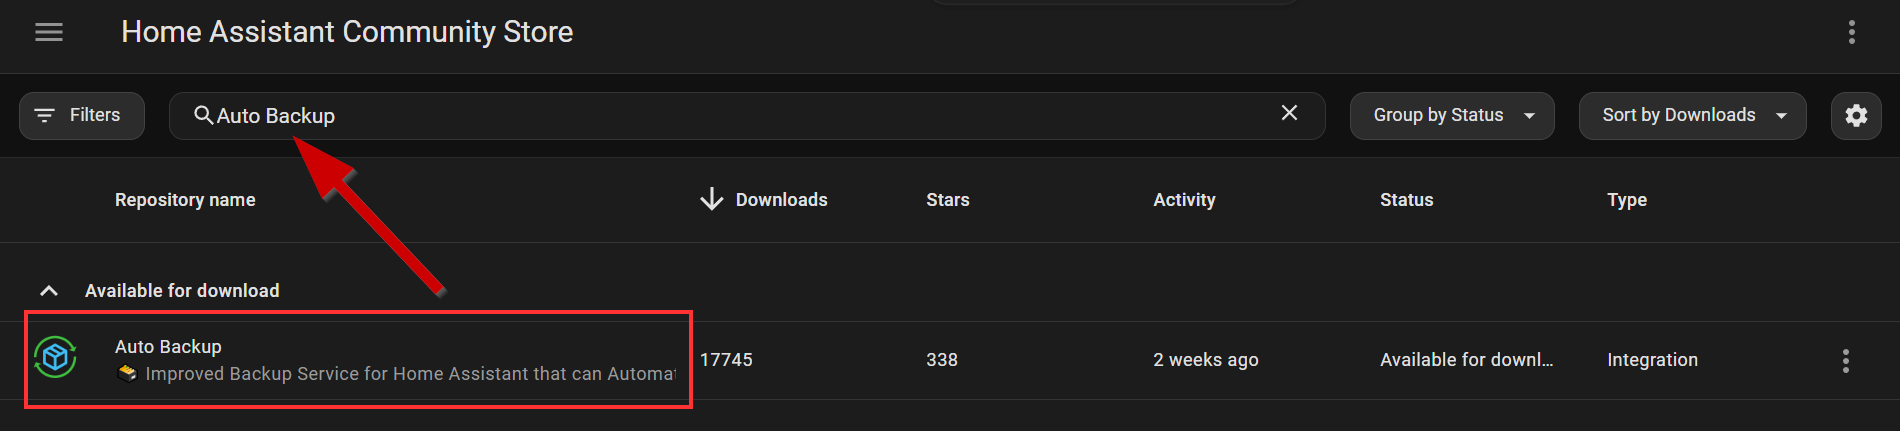
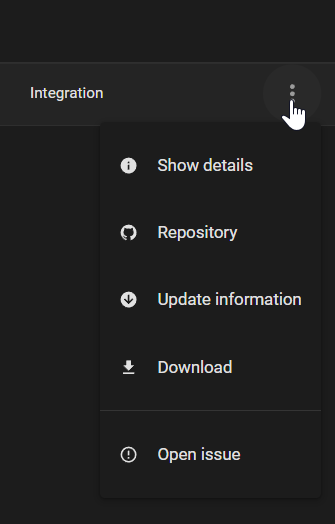
Clicking the three dots on the right side of that entry allows you to download it, which is how it gets installed.
You will get a window asking you to confirm that you want to download and to also specify an alternate version if you want. I'll stick to the latest version.
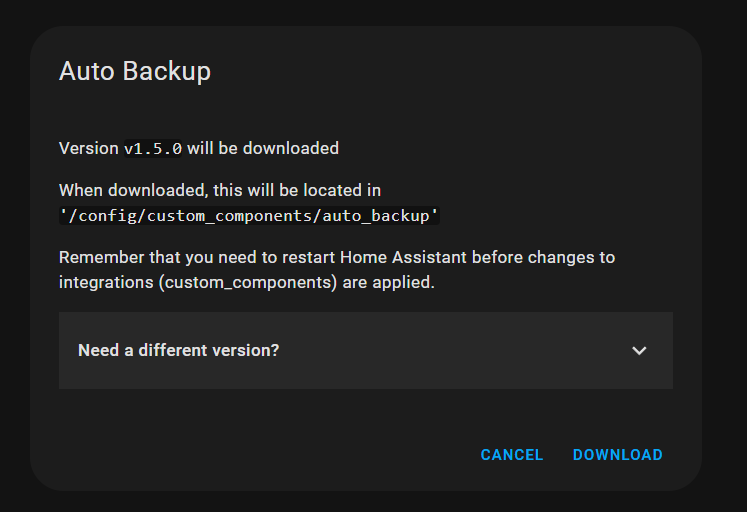
Once you click on download, you will need to restart Home Assistant. This is true of many integrations installed via HACS. Once you have restarted, you need to complete on final step and that is to add the link between this integration and Home Assistant. That is done on the Home Assistant integrations page.
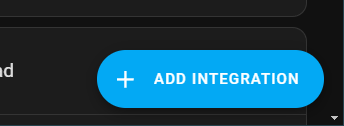
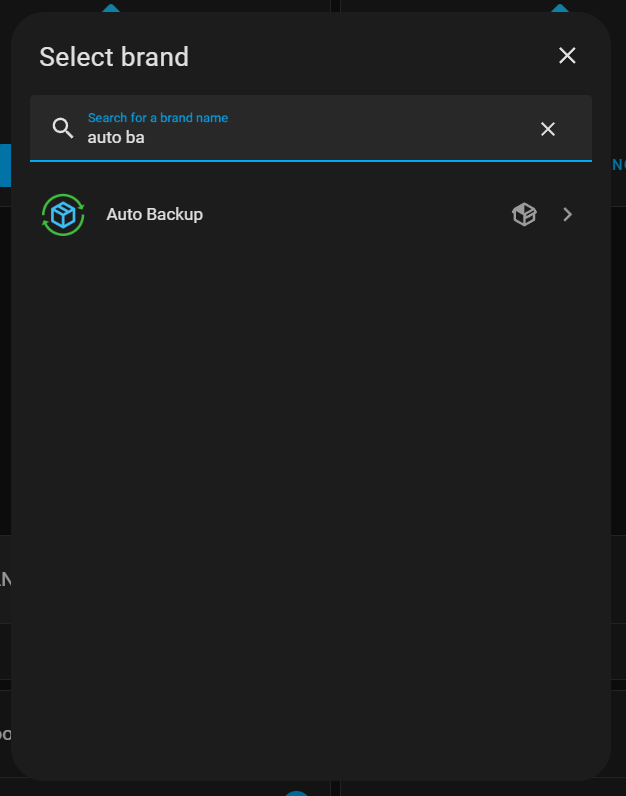
Navigate to Devices & Services -> Integrations and click the ADD INTEGRATION button on the bottom right of the screen.
Start searching for Auto Backup in the pop-up window and then click it.
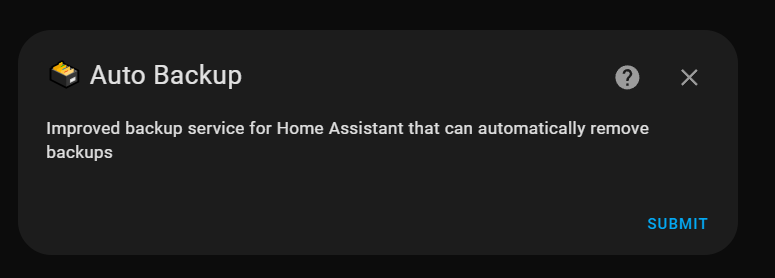
Click on Submit on the next popup and it will be ready to go.
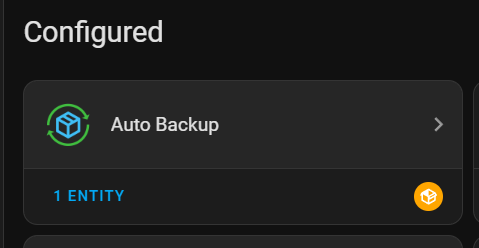
The integration will now show in the list of Configured integrations on the Home Assistant integrations page.
There are only two options (as of this writing) on the Auto Backup integration page. You can set Auto Backup to automatically delete expired backups and you can set the backup timeout. Regarding the timeout as noted on their documentation:
You can increase this value if you get timeout errors when creating a backup. This can happen with very large backups. Increasing this might make Auto Backup less reliable at monitoring backups to delete.
Everything else is set up via automation. For now, I will keep both settings as default.

Setting Up Backup Automation
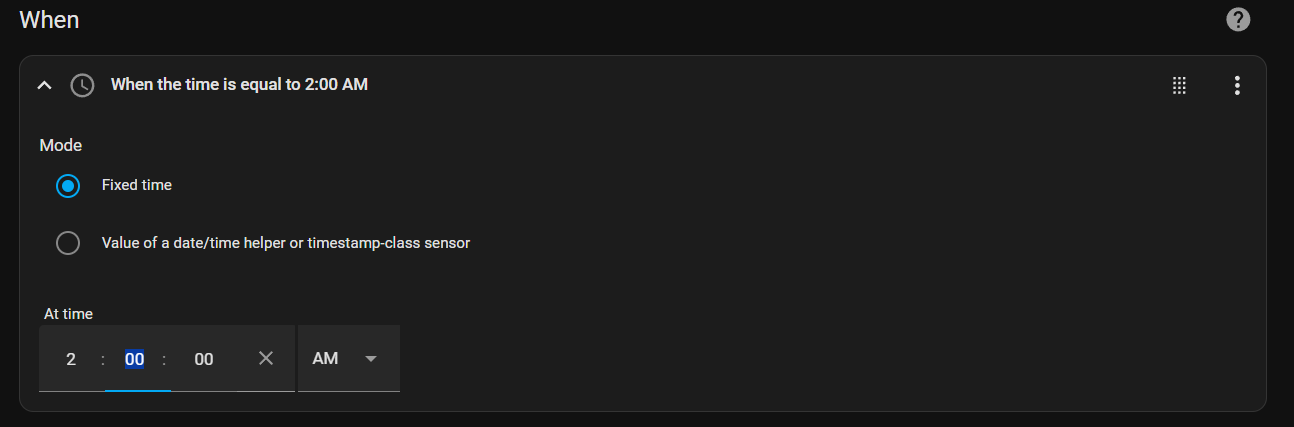
The only way to have Auto Backup run is via an action (formerly service calls). This is as simple as creating an automation and then adding the Auto Backup action. In this case, the trigger would be a specific time, although you can trigger it any way you like.
Under the "Then do" section of the automation, you would click on "ADD ACTION" and then search for auto backup.
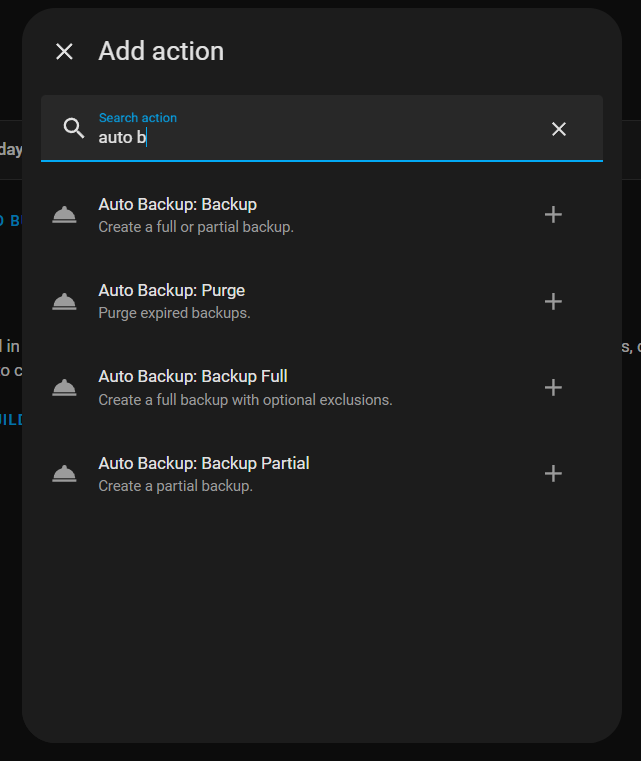
You would then choose either a partial or full backup. Choosing full backup in my case results in several fields that allow you to set the backup exactly the way you want it.
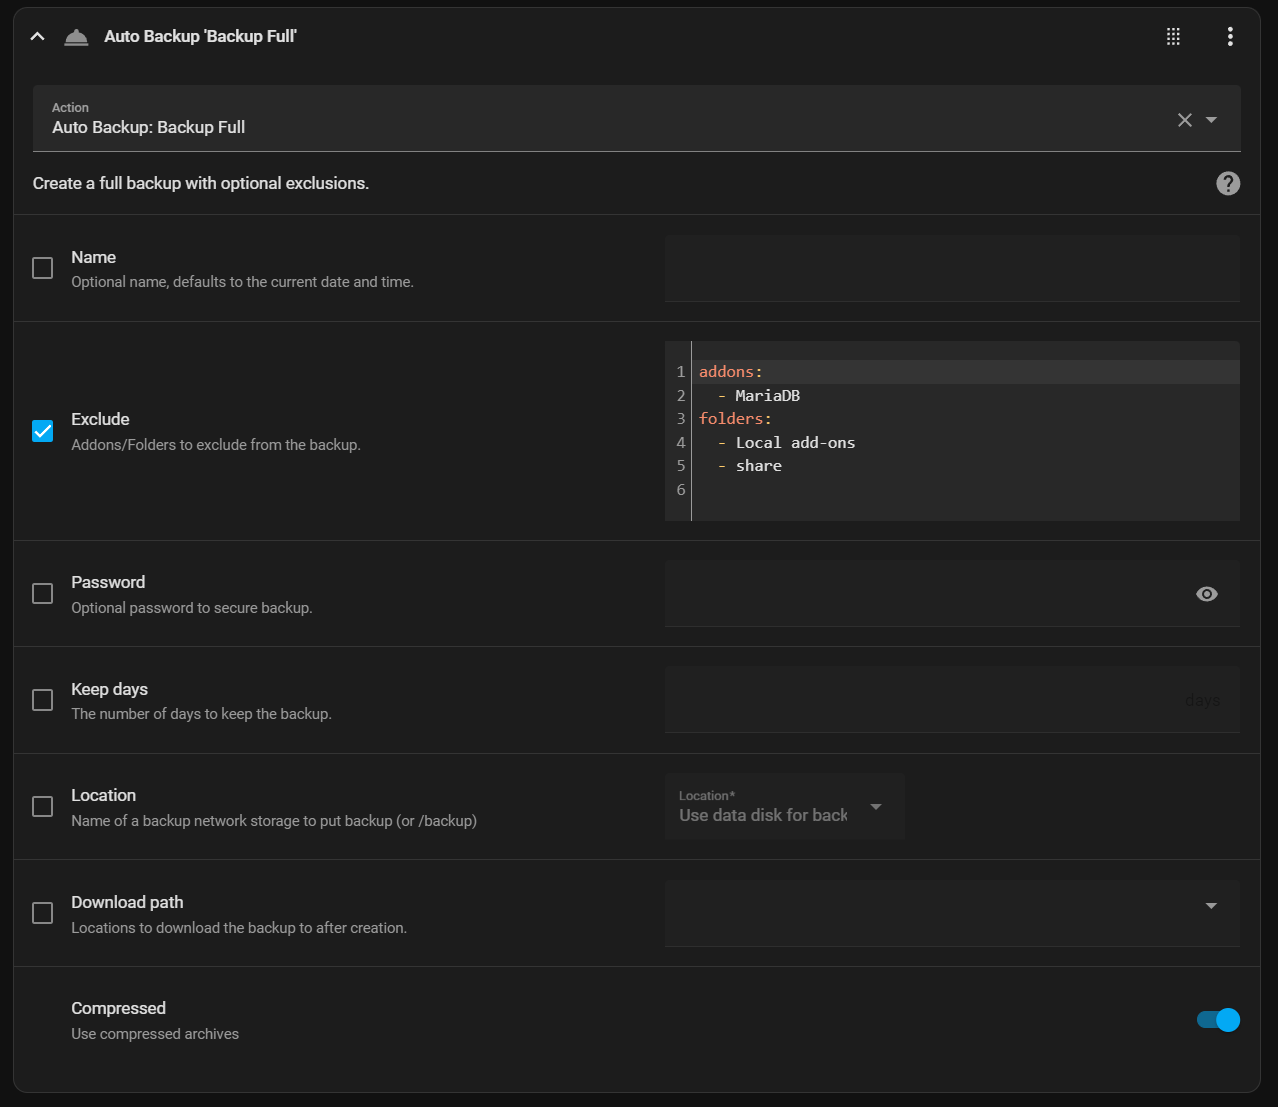
By default, the full backup already has some of the add-ons and folders set to be excluded. You can adjust this as needed. Typically I exclude the media folder and back up the rest. Again, you can configure this any way you like. I do want to point out that you need to make sure you choose the correct location for your backup. Locations are not set up via Auto Backup so you will need to set those up first before running this automation configuration. I have a network share setup that I will choose for my backup location. This has the added benefit of backing up off-device in case the device hardware fails. Additional backup locations can be added by navigating to Settings → System → Storage, and clicking the Add network storage button.
The Auto Backup documentation has several examples of backups that you can use to customize the backup sets that you create.
A note about the add-on and folder names from their documentation:
Addon names are case-insensitive and can be the addon name/title, these are the same names seen when creating a partial backup through the Supervisor backups page. They can also be the addons slug (slug must be lowercase). You can also use wildcards for matching slugs, such as core_* to include all core addons.
Folder names are also case-insensitive and use the names seen when creating a partial backup through the Supervisor backups page. Currently, accepted values are (ignoring case):
sslsharemediaaddonsorlocal add-onsoraddons/localconfigorhome assistant configurationorhomeassistant
Generational Backups
One of the more interesting features of Auto Backup is the use of generational backups. As mentioned before, generational backups reduce backup frequency as they get older. Setting this up leans a bit more towards the complicated side of the house but it isn't crazy hard. There are examples of automations on their advanced examples site. You could just copy/paste those in and adjust them as needed.
Here is an example of an automation that does Daily, Weekly, and Monthly backups in a single automation.
alias: AutoBackup
description: Unified Auto Backups
trigger:
  - platform: time
    at: "02:30:00"
condition: []
action:
  - choose:
      - conditions:
          - condition: template
            value_template: "{{ now().day == 1 }}"
        sequence:
          - service: auto_backup.backup
            data:
              keep_days: 365
              name: "MonthlyBackup: {{ now().strftime('%A, %B %-d, %Y') }}"
      - conditions:
          - condition: time
            weekday:
              - mon
        sequence:
          - service: auto_backup.backup
            data:
              keep_days: 28
              name: "WeeklyBackup: {{ now().strftime('%A, %B %-d, %Y') }}"
      - conditions:
          - condition: time
            weekday:
              - sun
              - tue
              - wed
              - thu
              - fri
              - sat
        sequence:
          - service: auto_backup.backup
            data:
              keep_days: 7
              name: "DailyBackup: {{ now().strftime('%A, %B %-d, %Y') }}"
mode: single
This automation creates a daily backup for all days except Monday and keeps that for 7 days. It creates a weekly backup on Monday and keeps those for 28 days. Finally, it creates a monthly backup and keeps that for 365 days.
Summary
Auto Backup lets you take control of your Home Assistant backups and tailor them exactly as you need. It allows for the exclusion of add-ons and folders and allows the deletion of expired backups. Finally, it allows you to create long-term generational backups. All this through simple automations. Give it a try for yourself!
Don't forget to watch the video!